Deploy RemotePC™ using Group Policy (GP) with MSI and MST files
Using the RemotePC MSI package, remotely install the application on multiple computers in a network from the Windows Server Environment by setting up the Group Policy on the host server.
To achieve this, create a Group Policy Object, move the RemotePC MSI package and MST file to a shared network folder, and publish the GPO to all the computers across the domain. Read the steps detailed below to know more.
- Steps to create a Group Policy Object (GPO) under active directory environment
- Steps to assign and install the RemotePC application on domain computers
- Steps to deploy the RemotePC application on domain computers
- Deploy RemotePC silently
Steps to create a Group Policy Object (GPO) under active directory environment
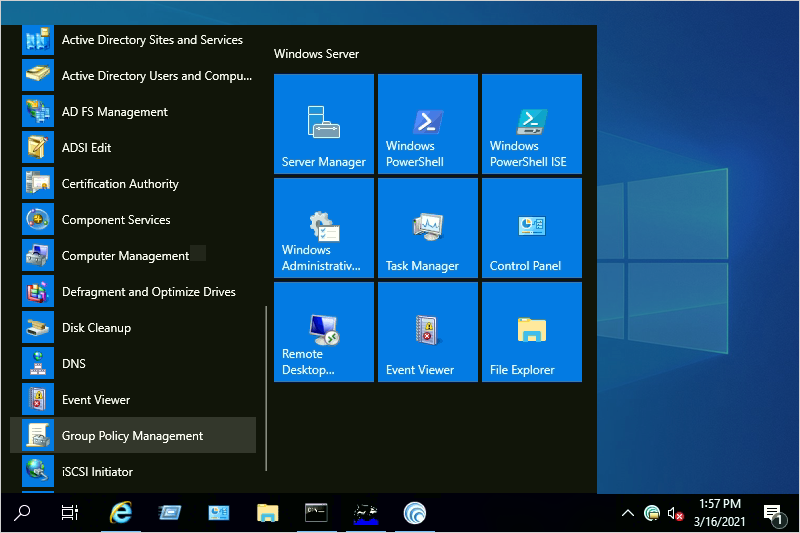
- From the ‘Start’ menu, go to ‘Administrative Tools’ and open ‘Group Policy Management’.
- In the 'Group Policy Management' console, navigate to the 'Forest' folder for creating group policy.
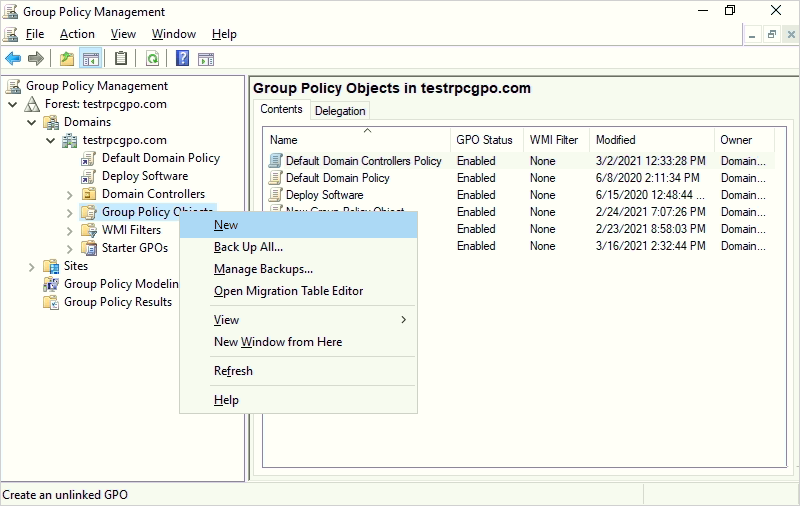
- Double-click 'Domains' and navigate to 'Group Policy Object'.

- Right-click 'Group Policy Object' and select 'New' from the drop-down menu.
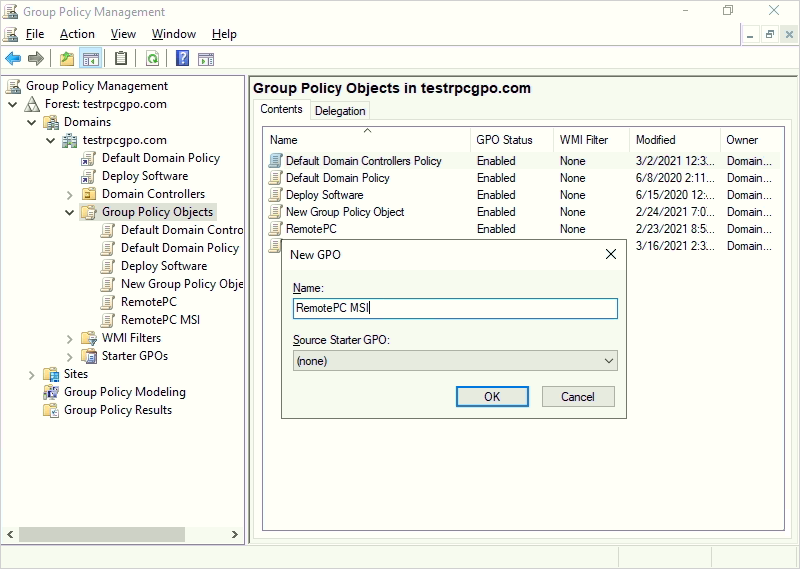
- Assign a name to the GPO group and click 'OK'.
Steps to assign and install the RemotePC application on domain computers
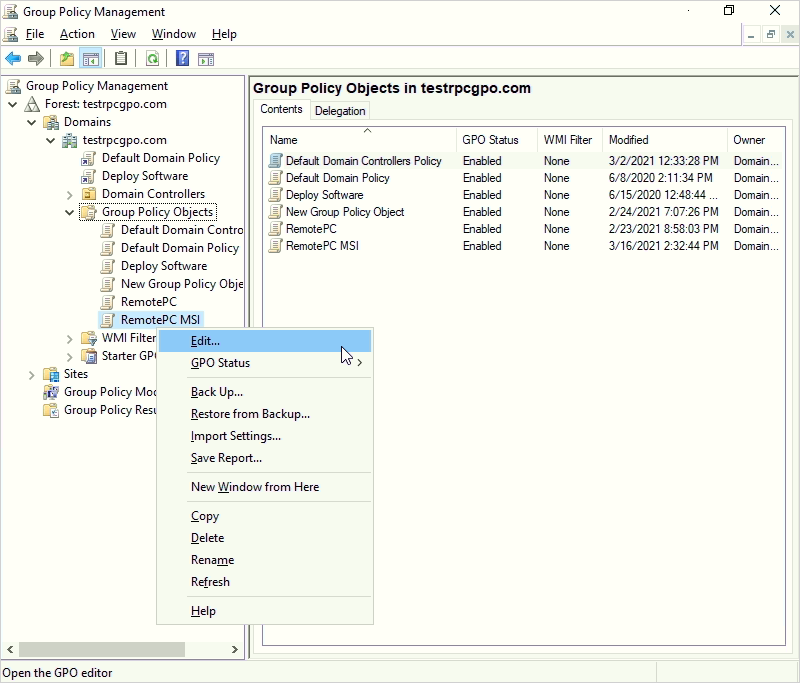
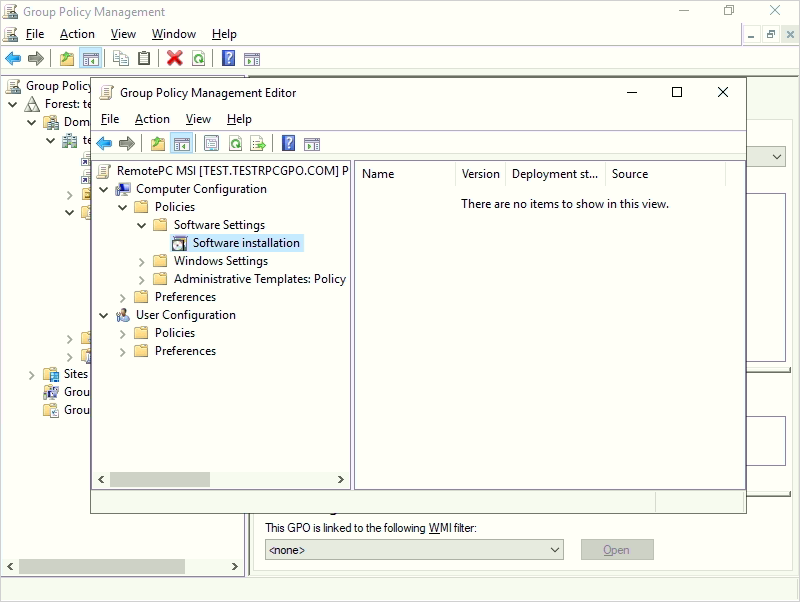
- Right-click the new group policy and select 'Edit' from the drop-down menu. This will launch the 'Group Policy Management Editor'.
- Navigate to 'Computer Configuration' > 'Policies' > 'Software Settings' > 'Software installation'.
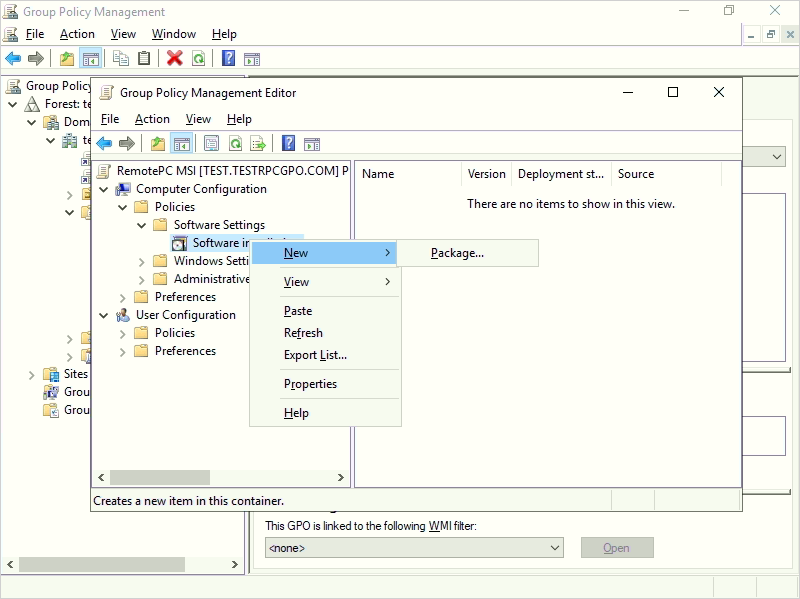
- Right-click 'Software installation' and navigate to 'New' > 'Package'.
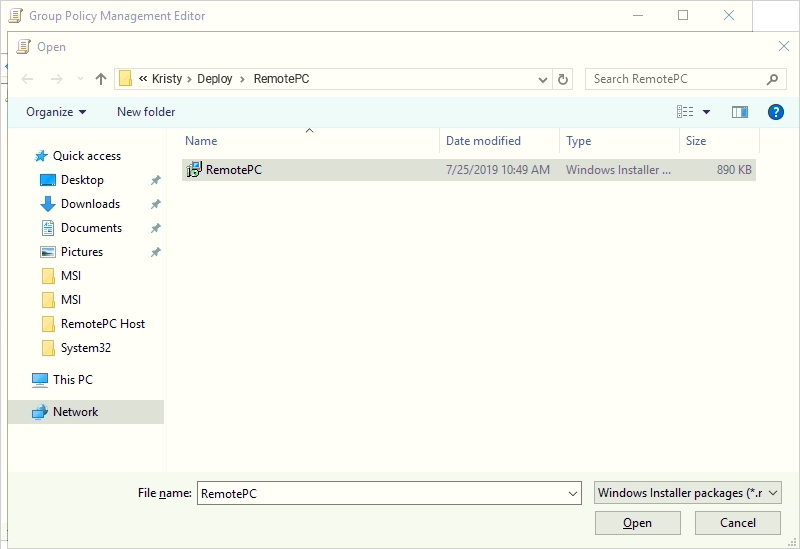
- Locate the shared network folder with the RemotePC MSI installer package.
- Select the package and click 'Open' to add to the software installation container.
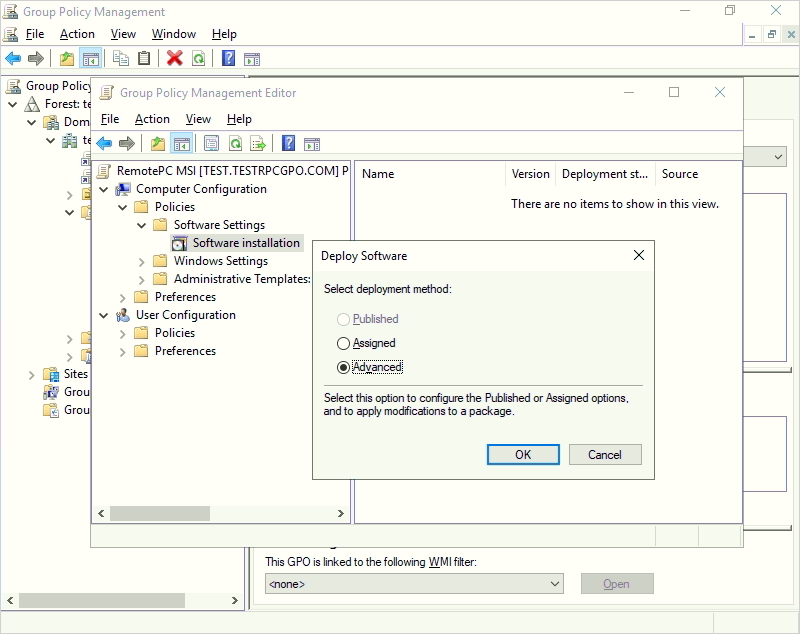
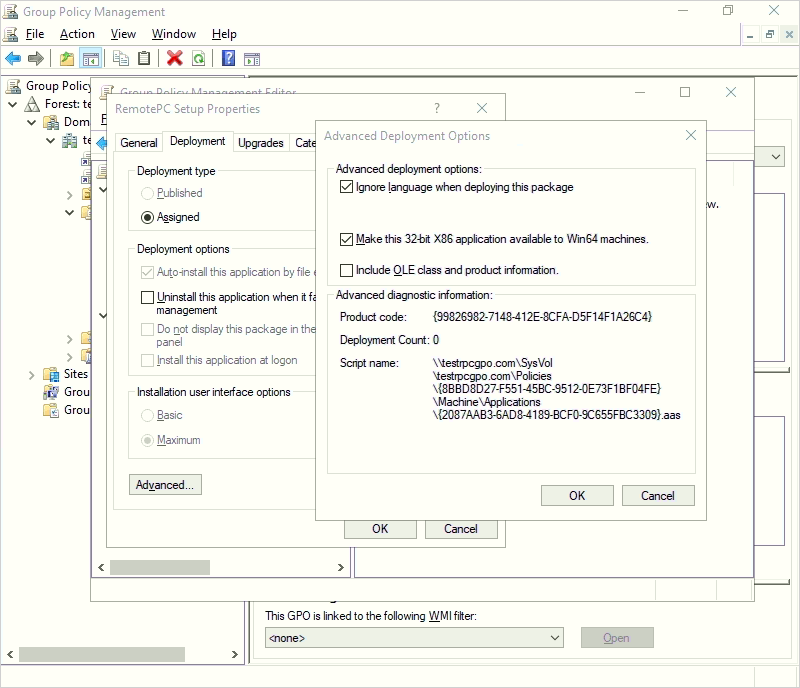
- After selecting the RemotePC MSI file, choose the 'Advanced' option in the pop-up that appears and click 'OK'.
- Go to the 'Advanced Deployment Options' tab, select 'Ignore language when deploying this package'. Click 'OK'.
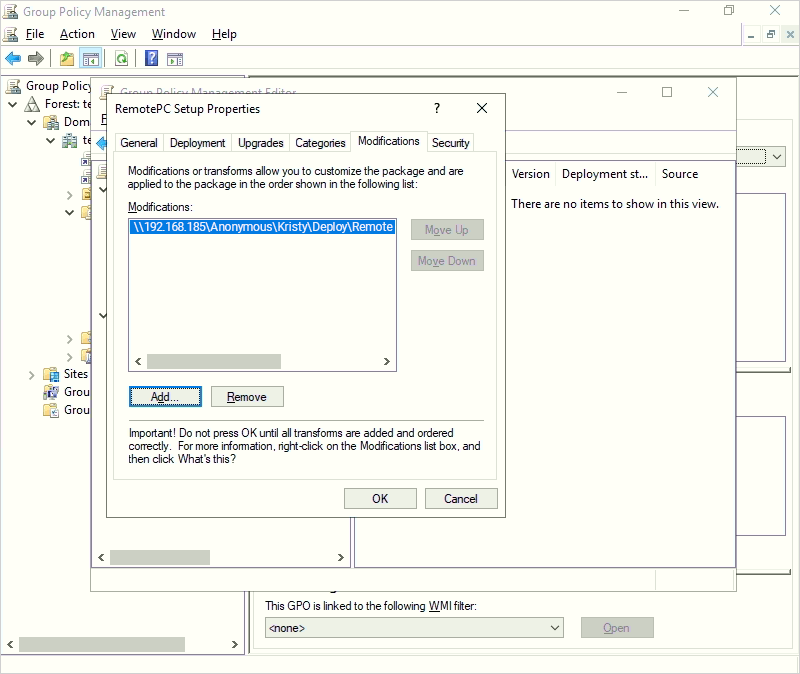
- Go to the 'Modifications' tab in the 'RemotePC Setup Properties' section to add the MST file you just created. Click here to know how to create an MST file via Orca tool.
- Right-click on the MSI package and select 'Properties'. The ‘Properties' window will appear.
- Go to the 'Deployment' tab. Under 'Deployment type', select 'Assigned' and under 'Deployment options', select 'Install this application at logon' for the ‘User Configuration’ type, and click ‘OK’.
- Right-click the domain and select 'Link an Existing GPO'. The 'Select GPO' screen will appear.
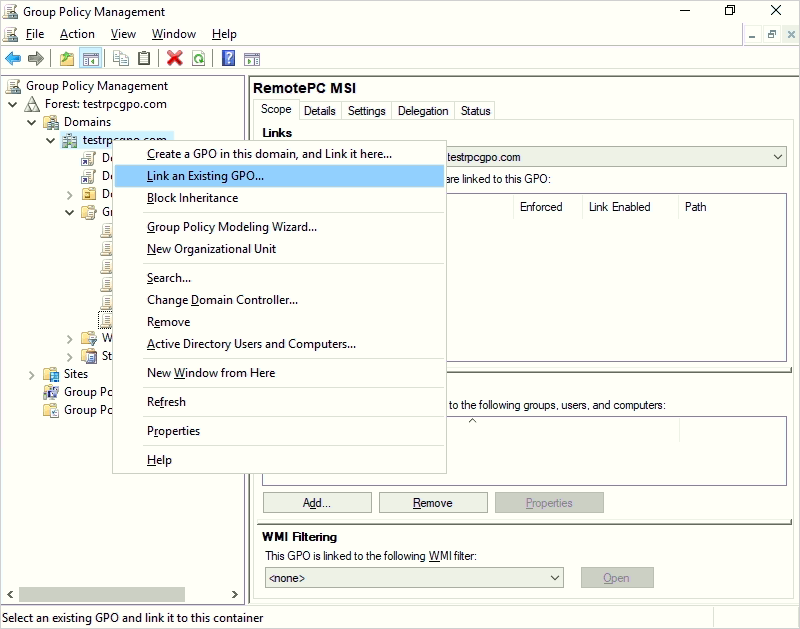
- Select the newly created Group Policy and click 'OK'.
Steps to deploy the RemotePC application on domain computers
- Open the command prompt.
- Run the following command:
gpupdate /force - Click 'Enter'.
Note:
- Reboot the computer (This is a mandatory step).
- After system reboot, RemotePC will be deployed.
The RemotePC application will be assigned to the domain users on the next sign in and to the domain computers on the next reboot.
You can also deploy the RemotePC application to all connected computers using a command line parameter in a few simple steps.
Steps to install the RemotePC by using "msiexec.exe" Command-Line Parameters
Run the following commands in the command prompt to install the RemotePC.
To install RemotePC
- Launch command prompt in administrator mode.
- Ensure that the path is: C:\WINDOWS\system32
- Execute the command:
msiexec.exe /i <RemotePC.msi path> /qn ID=<Configuration ID> GROUPNAME=<group name> PERSONALKEY=<personal key> HIDETRAY=<0 or 1> CONNECT_PERMISSION=<0 or 1 or 2 or 3> REMOVE_WALLPAPER=<0 or 1> DISABLE_AERO_THEME=<0 or 1> DISABLE_FONT=<0 or 1> DISABLE_SLEEP_MODE=<0 or 1> HARDWARE_ACCELERATION=<0 or 1> CONNECT_TO_ACTIVE_SESSION=<0 or 1> SHOW_WHO_IS_ACCESSING=<0 or 1>COMPUTERNAME=<Computer Name> SHOW_CONFIRM=<0 or 1>
For example:

Uninstall RemotePC host using MSI
To uninstall RemotePC host using MSI,
- Launch command prompt in administrator mode.
- Ensure that the path is: C:\WINDOWS\system32>
- Uninstall RemotePC host using the command:
msiexec.exe /i <RemotePC.msi path> /qn UNINSTALL=yes
For Example:
msiexec.exe /i "C:\Users\Test\Desktop\MSI\UN\RemotePC.msi" /qn UNINSTALL=yes
Deploy RemotePC silently using command-line parameters
You can predefine optional parameters for the remote computer during installation.
| Parameters | Description |
|---|---|
| ID | This is a mandatory parameter and you can find it under Deploy Package > Group deployment via MSI > Configuration ID in your RemotePC account |
| PERSONALKEY | Set a 'Personal Key' for the remote computer |
| GROUPNAME | Name of the group in which the computer will be assigned * |
| COMPUTERNAME | Name of the machine assigned to the host |
| UNINSTALL | Uninstall RemotePC host using the MSI command UNINSTALL=yes Note: Use this as a stand-alone parameter |
| HIDETRAY | |
| 1 | Enabling this option will prevent users from accessing the tray options on their remote computers |
| 0 | Unhide tray and allow users to access tray options |
| CONNECT_PERMISSION | |
| 0 | Connection request permission is disabled |
| 1 | Automatically decline connection in the login screen after the request expires |
| 2 | Automatically allow connection in the login screen after the request expires |
| 3 | Allow connection after the request expires |
| REMOVE_WALLPAPER | |
| 1 | Enabling this option will remove the wallpaper during remote session |
| 0 | Wallpaper is displayed during remote session |
| DISABLE_AERO_THEME | |
| 1 | Disable the aero theme during remote session |
| 0 | Aero theme remains active during remote session |
| DISABLE_FONT | |
| 1 | Font smoothing is disabled during the remote session |
| 0 | Font smoothing is enabled |
| DISABLE_SLEEP_MODE | |
| 1 | Disable sleep mode when host is configured |
| 0 | If this option is disabled, the remote computer will go to sleep mode after a specific time. |
| HARDWARE_ACCELERATION | |
| 1 | Use hardware acceleration during the remote session |
| 0 | Hardware acceleration is disabled |
| CONNECT_TO_ACTIVE_SESSION | |
| 1 | Enabling this option will allow users to connect to an active session |
| 0 | Connection to an active session is disabled |
| SHOW_WHO_IS_ACCESSING | |
| 1 | Show notification for who is accessing during a remote session |
| 0 | Hide notification for who is accessing during a remote session |
| SHOW_CONFIRM | |
| 0 | Do not display consent window; configure host automatically |
| 1 (or any other value) | Display consent window on host; Confirm – Machine comes online; Reject – Machine remains offline. |
*Note:
- COMPUTERNAME should be between 1 to 50 characters.
- In case the group name does not exist, a new group will be created with the submitted name and the computer will be assigned to it.
- If the computer already exists in any other group, it will be moved to the new group specified by the user.